How to add Facebook Pixel on Magento 2
Making Meta ads work is not so easy. Without an accurate understanding of user behavior, creating effective campaigns on Meta will be quite difficult.
That's why you need Meta Pixel - a small piece of code that matters a lot. You add a Meta pixel to Magento 2, allow it to track information about various events that users perform on your website, and send this data to Meta Ads Manager.
The data collected Meta pixel script allows you to set up a Meta ad that converts.
So how do you add a Meta Pixel to your Magento 2 site?
Why do you need Meta Pixel?
The Meta pixel has great importance in three areas: Audience creation, measurement, and optimization.

Meta Pixel collects:
- Key page views
- Product searches on your website
- Add to cart/wishlist
- Checkout
- Add payment information
- Purchases or checkout flow
- Lead
- Subscription, sign-up
How to install it?
1. Install the Meta Pixel extension for Magento 2.
2. Go to Stores> Condition> Pronko Extensions> Meta Pixel and click Stores> Configuration> Meta> Business Extension.
3. Start integrating the Meta Business module.
4. Continue integrating with your Meta account. If you don't have a Meta account, create one.
5. Start opening your store and choose what you want to manage by adding a Meta pixel to your Magento store.
6. Select Business Manager. If you don't have a Meta Business account, create one. It allows you to manage your Meta page, directory, and pixel.
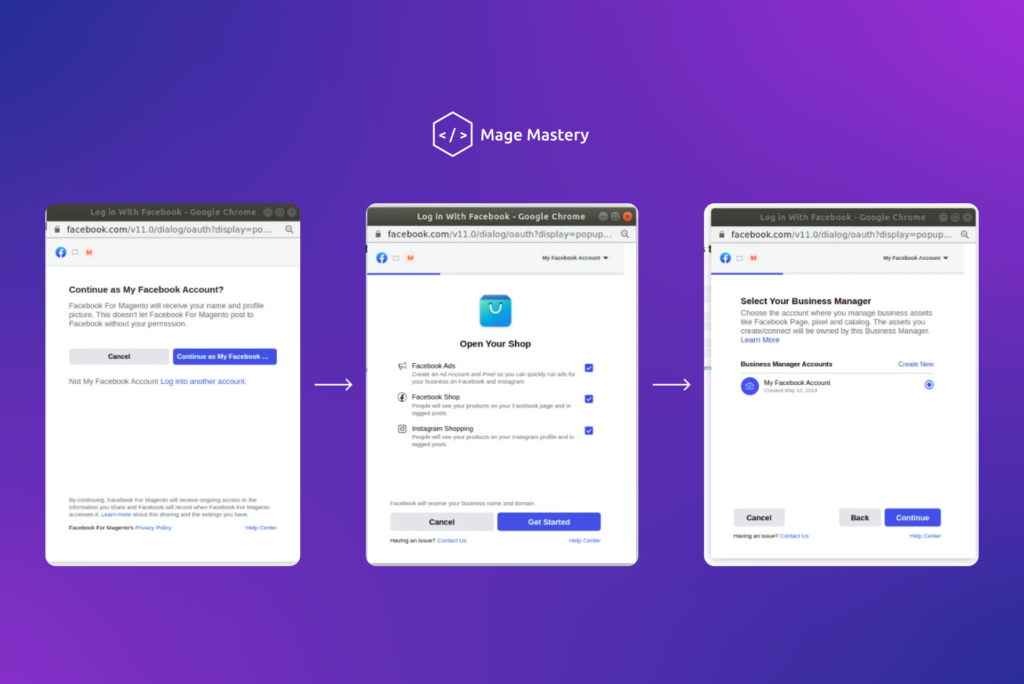
7. Add your Meta page to your Magento 2 store to be able to show your products in the Meta store. Create a Meta page if you haven't already.
8. Add your Instagram to Magento 2 if you've linked your Instagram account to Meta Manager.
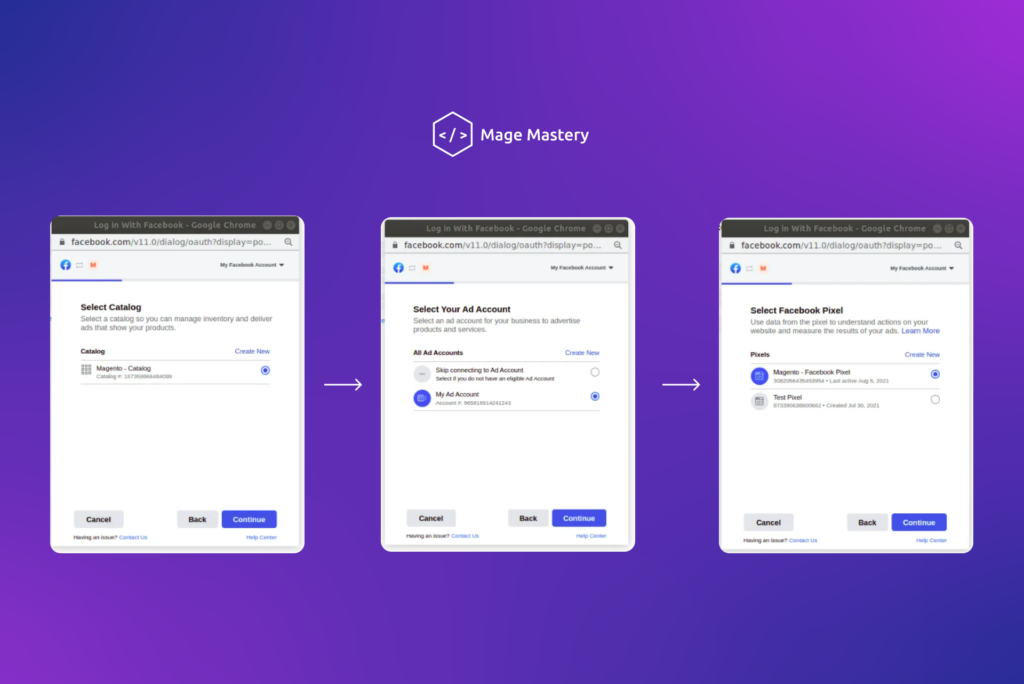
9. Select the Magento Catalog that you want to add to Meta and create dynamic ads based on the data collected by Meta Pixel.
10. Add your Meta Ads account if you want to advertise your products or services or just skip the connection.
11. Select the Meta Pixel you want to add to the Magento store.
Magento - Meta Pixel is a pixel that will be added to the builds of your website as soon as you finish integrating the Meta Business module. If you have created some pixels before, they will also appear in this list.
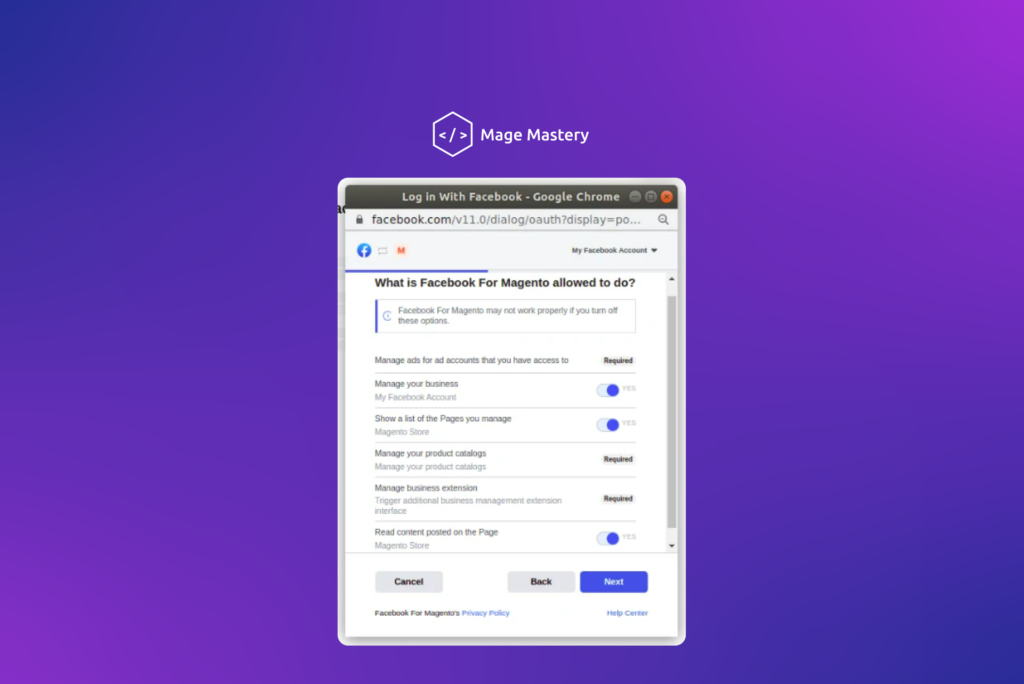
12. Verify your Commerce Account, the Meta page you added earlier.
Once you have verified your Commerce Account, you will see all the information you provided earlier. Review and check it out. Then you will see what Meta for Magento will have access to. Some options are required and some you can disable. This is the last step. So when you click Next, your Magento 2 store will be integrated into Meta, and Meta pixel will be added to your store pages.
Do you want to add Meta Pixel? Get support with Pronko Consulting and Meta Pixel extension:
- Add Facebook Pixel on all Pages
- Track dynamic events such as Product view, Category view, and add to cart
- Track conversion on your website
- Enable or disable dynamic events separately
- Easily manage Facebook integration from Magento Admin
Please, contact us if you have any questions at support@pronkoconsulting.com